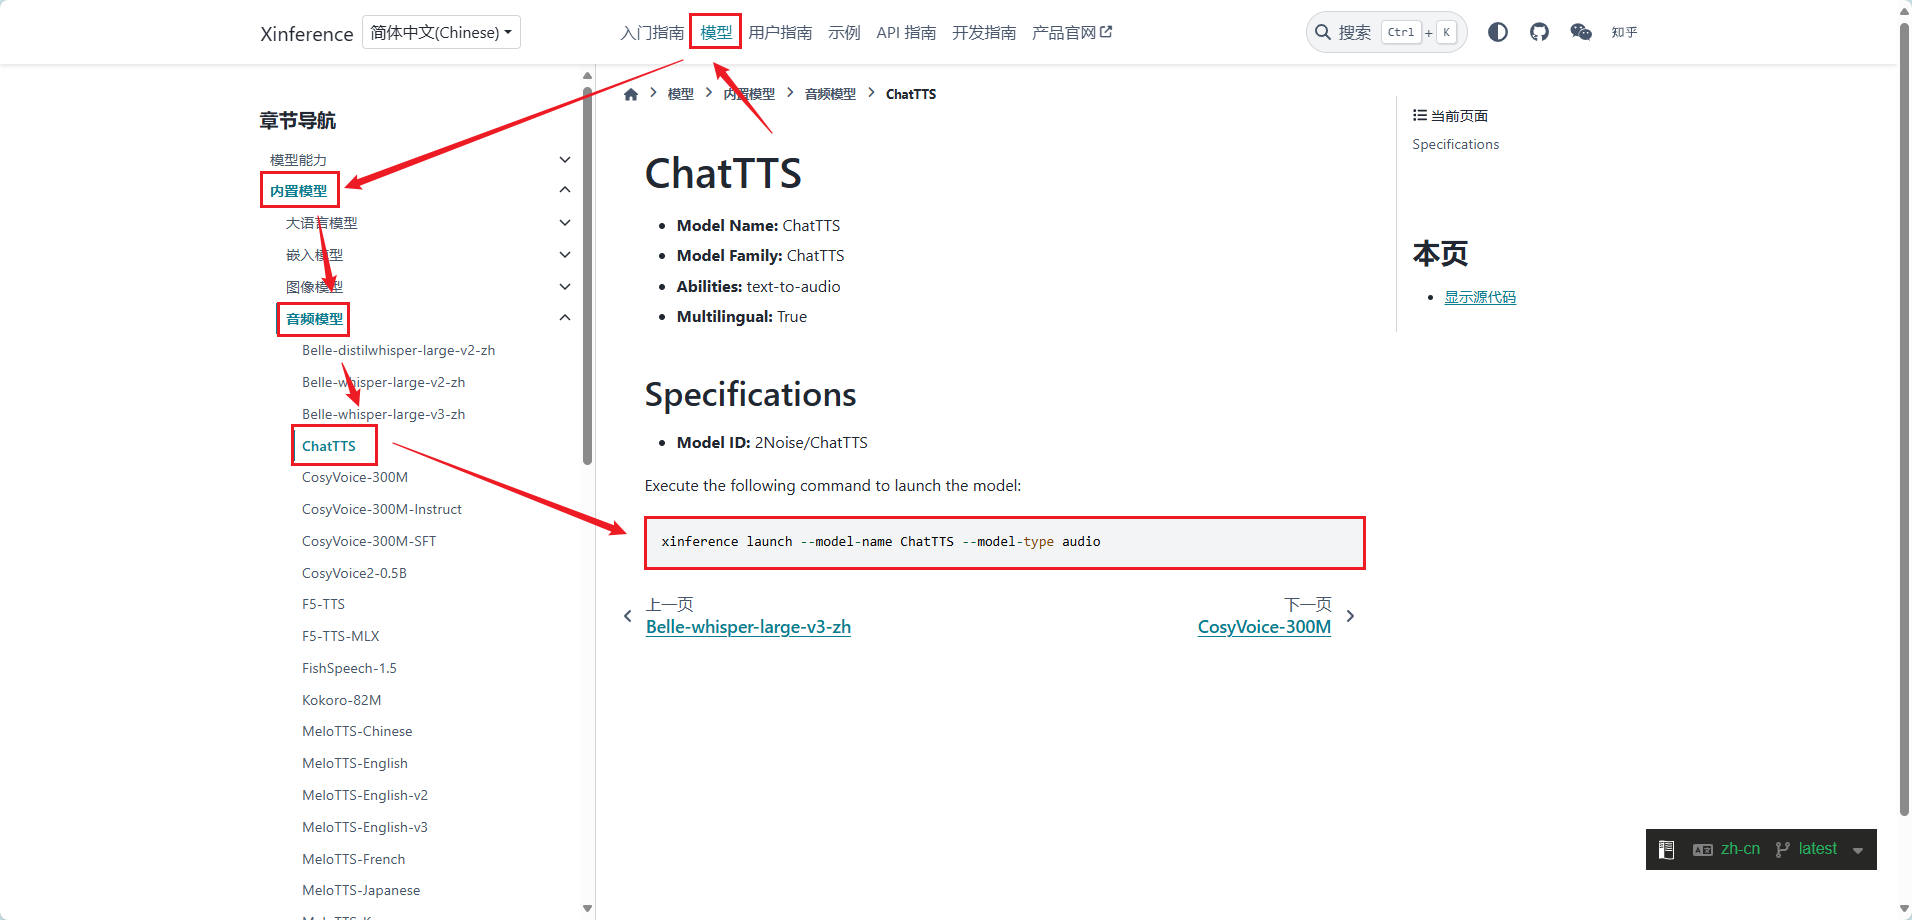
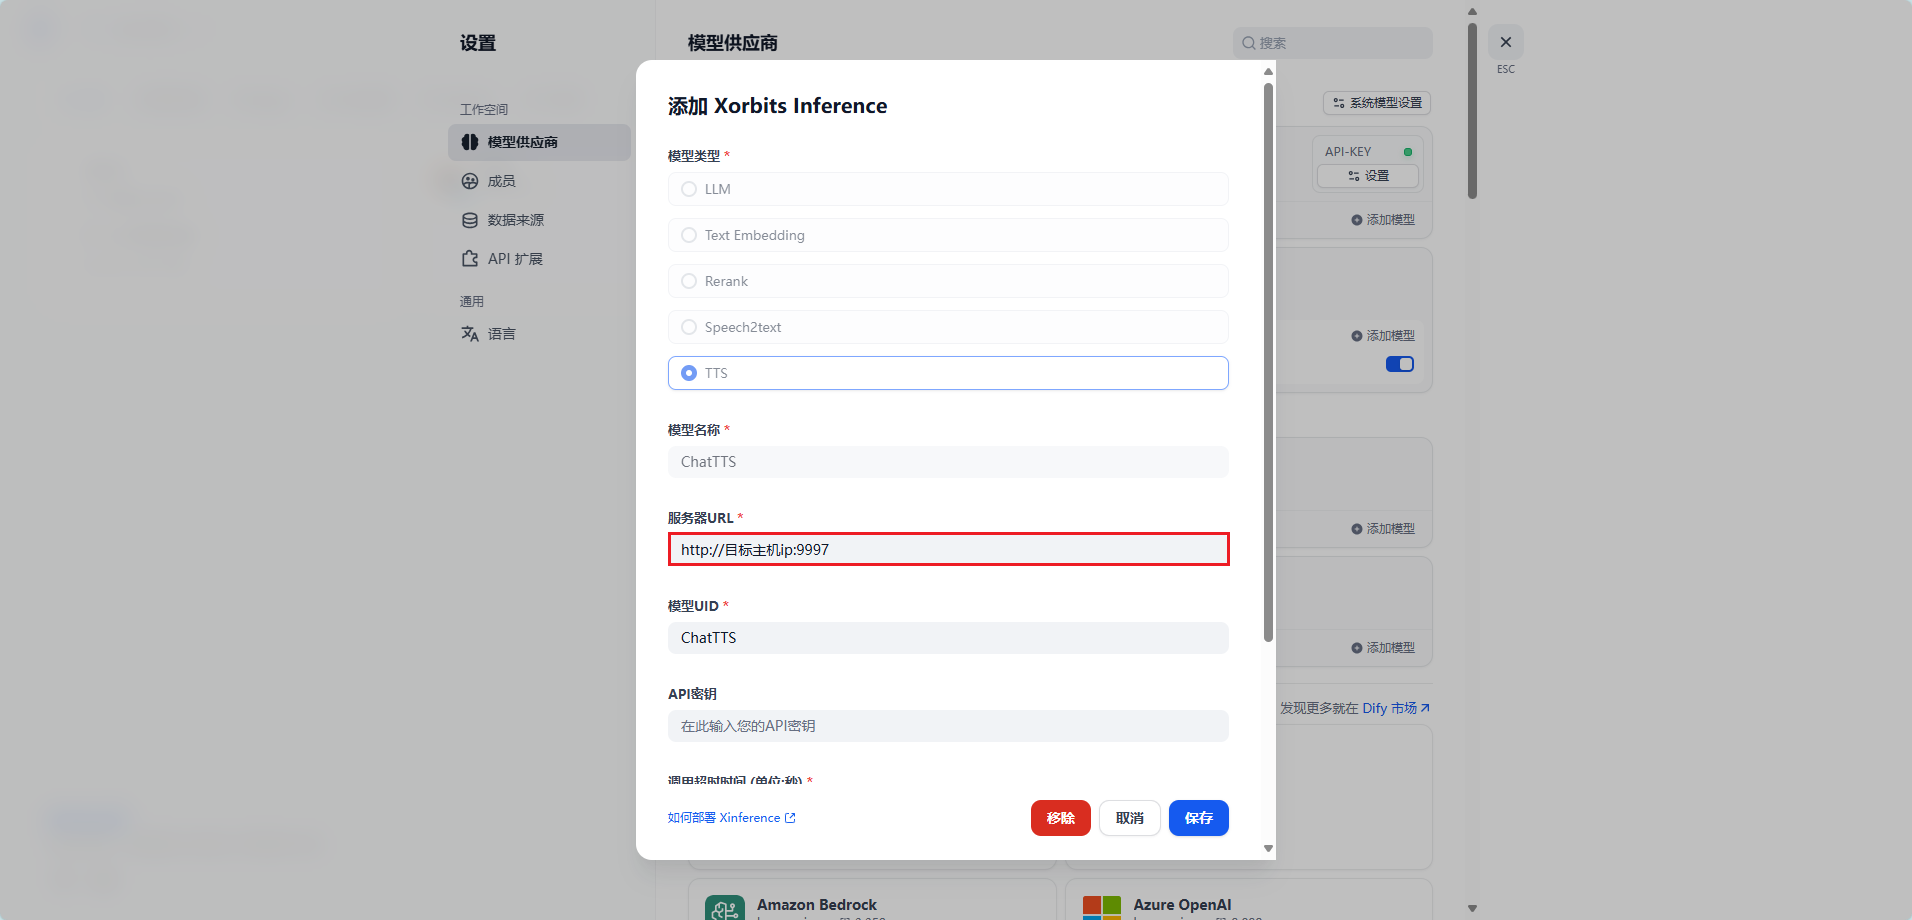
Xinference 安装 piliqiu2025-04-06 约 200 字 预计阅读 1 分钟 - 次阅读 目录 安装 Xinference Dify 添加 Xinference 警告 本文最后更新于 2025-04-06,文中内容可能已过时。 安装 Xinference 1 2 3 4 5 6 7 8 9 10 11 12 13 14 15 16 17 18 19 20 21 22 23 24 25 26 27 28 29 30 31 32 33 34 # 创建虚拟环境 conda create -n xinference python=3.11 # 激活虚拟环境 conda activate xinference # 安装的时候报错,提示缺少 torch,pip install torch 安装 torch pip install "xinference[all]" # Apple M系列 CMAKE_ARGS="-DLLAMA_METAL=on" pip install llama-cpp-python # 英伟达显卡 CMAKE_ARGS="-DLLAMA_CUBLAS=on" pip install llama-cpp-python # AMD 显卡 CMAKE_ARGS="-DLLAMA_HIPBLAS=on" pip install llama-cpp-python # 启动 Xinference xinference-local --host 主机ip --port 9997 # 启动模型 xinference launch --model-name ChatTTS --model-type audio --endpoint http://主机ip:9997 # 因为是 TTS 模型,需要安装 ffmpeg conda install -c conda-forge ffmpeg ffmpeg -version # 在使用的时候报错:ImportError: Failed to intialize FFmpeg extension. Tried versions: ['6', '5', '4', '']. Enable DEBUG logging to see more details about the error. # 降级 FFmpeg conda activate xinference conda install -c conda-forge ffmpeg=5.1.2 ffmpeg -version (图1) Dify 添加 Xinference (图2)