使用 Docker Compose 部署 Cloudreve
注意
需要确保 Cloudreve 和 OnlyOffice 在同一个 docker 网络中,是他们能够互相访问到。
 1
 2
 3
 4
 5
 6
 7
 8
 9
10
11
12
13
14
15
16
17
18
19
20
21
22
23
24
25
26
27
28
29
30
31
32
33
34
35
36
37
38
39
40
41
42
43
44
45
46
47
48
49
50
51
52
|
services:
  pro:
    image: cloudreve/cloudreve:latest
    container_name: cloudreve-backend
    depends_on:
      - postgresql
      - redis
    restart: always
    ports:
      - 5212:5212
    environment:
      - CR_CONF_Database.Type=postgres
      - CR_CONF_Database.Host=postgresql
      - CR_CONF_Database.User=cloudreve
      - CR_CONF_Database.Name=cloudreve
      - CR_CONF_Database.Port=5432
      - CR_CONF_Redis.Server=redis:6379
      - CR_CONF_WOPI.Endpoint=http://onlyoffice/hosting/discovery  # 使用容器名
    volumes:
      - backend_data:/cloudreve/data
    networks:
      - cloudreve_net  # 网络

  postgresql:
    image: postgres:latest
    container_name: postgresql
    environment:
      - POSTGRES_USER=cloudreve
      - POSTGRES_DB=cloudreve
      - POSTGRES_HOST_AUTH_METHOD=trust
    volumes:
      - database_postgres:/var/lib/postgresql/data
    networks:
      - cloudreve_net  # 网络

  redis:
    image: redis:latest
    container_name: redis
    volumes:
      - redis_data:/data
    networks:
      - cloudreve_net  # 网络

volumes:
  backend_data:
  database_postgres:
  redis_data:

networks:
  cloudreve_net:
    external: true
    name: cloudreve_net  # 使用已有的 external 网络
|
使用 Docker Compose 部署 OnlyOffice
提示
下方高亮部分,可自定义端口和数据目录:
- 端口号:第
8 行冒号左侧的 8081 表示对外暴露的端口号,如其他程序占用,则请修改为其他端口号。
- 数据目录:第
10-13 行表示数据文件映射到宿主机目录,如看不懂或不需要,可删除 10-13 行。
 1
 2
 3
 4
 5
 6
 7
 8
 9
10
11
12
13
14
15
16
17
18
19
20
21
22
23
|
version: '3'
services:
  onlyoffice:
    container_name: onlyoffice
    image: onlyoffice/documentserver:latest
    restart: always
    ports:
     - "8081:80"
    volumes:
     - '$PWD/logs:/var/log/onlyoffice'
     - '$PWD/data:/var/www/onlyoffice/Data'
     - '$PWD/lib:/var/lib/onlyoffice'
     - '$PWD/db:/var/lib/postgresql'
    environment:
      - WOPI_ENABLED=true   # 开启 WOPI 功能
      - WOPI_URL=http://cloudreve-backend:5212  # 确保使用服务名
    networks:
      - cloudreve_net

networks:
  cloudreve_net:
    external: true
    name: cloudreve_net  # 明确指定网络名称
|
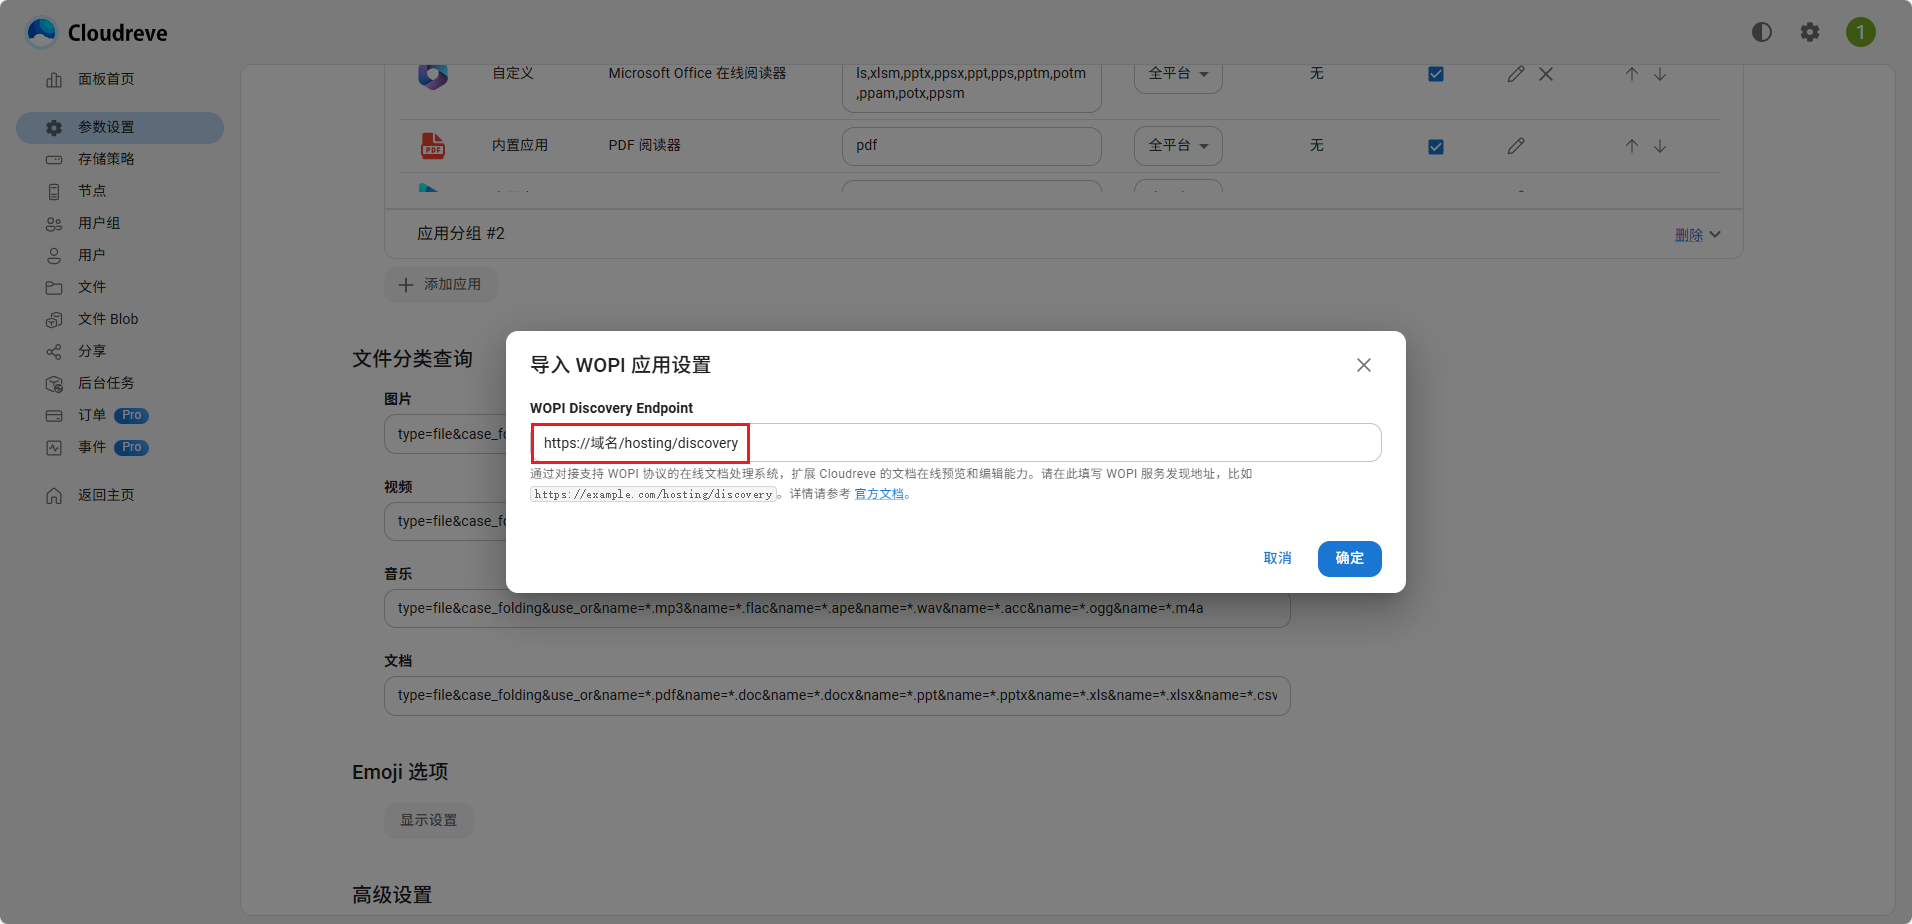
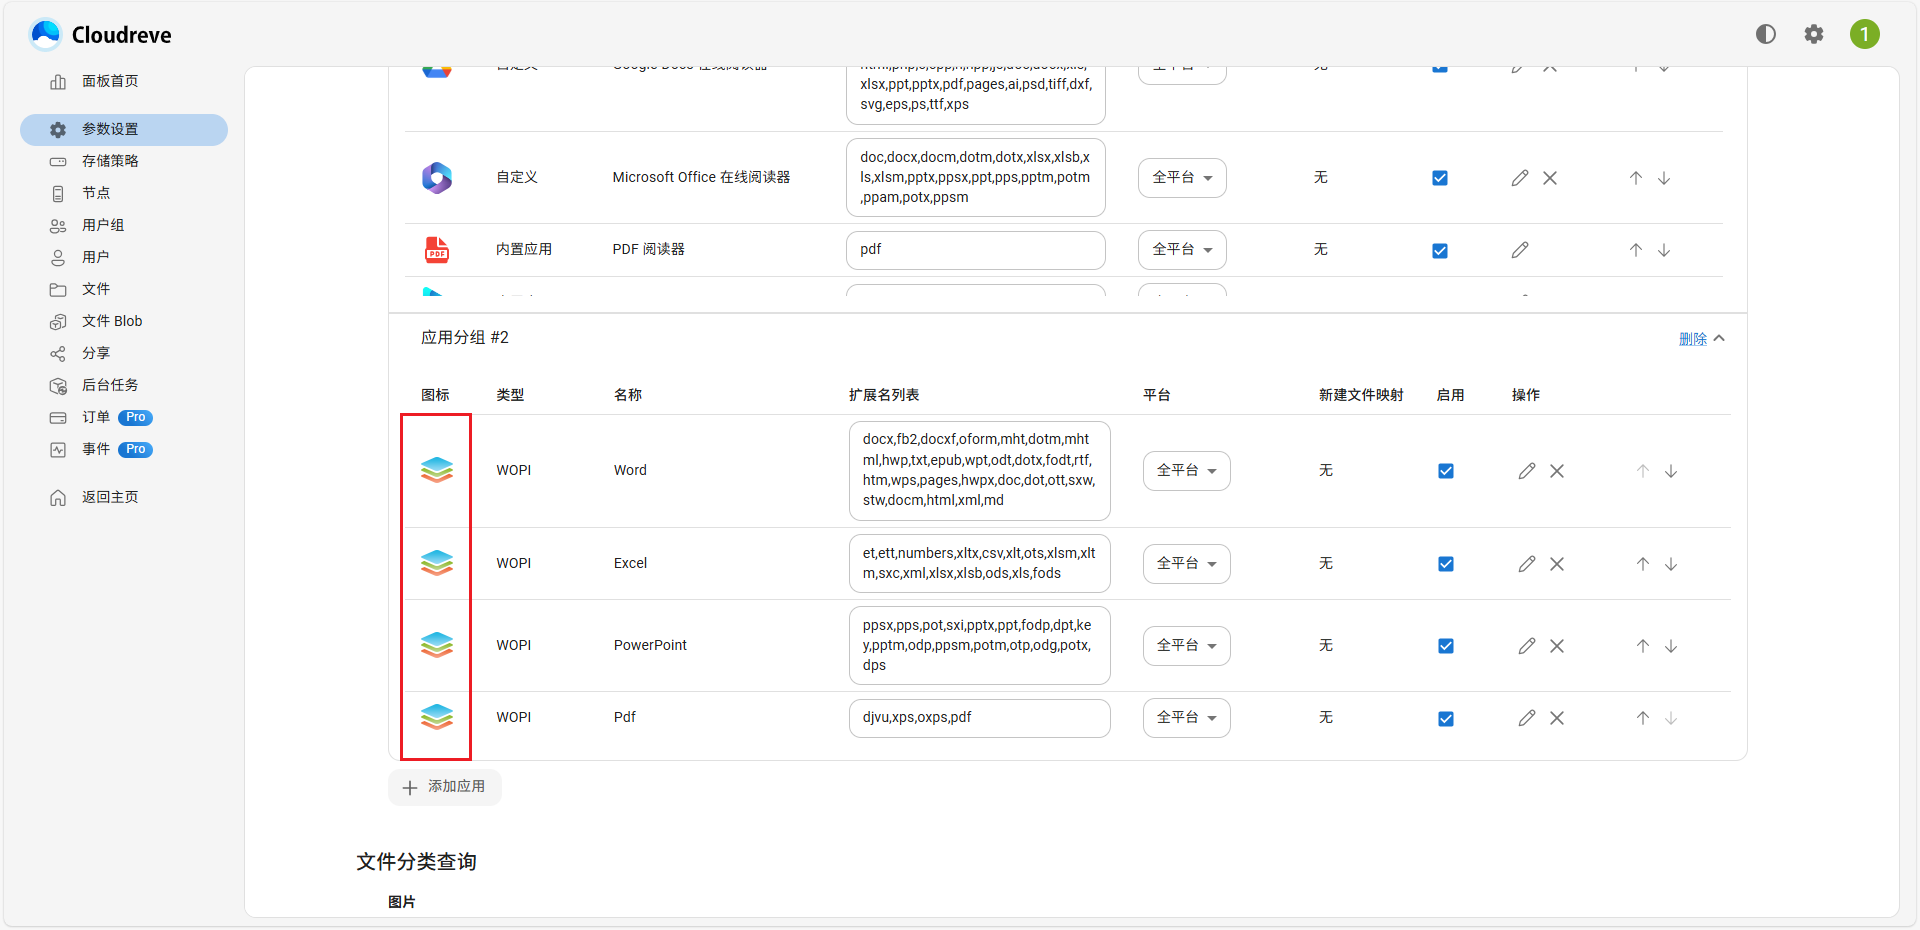
Cloudreve 接入 OnlyOffice
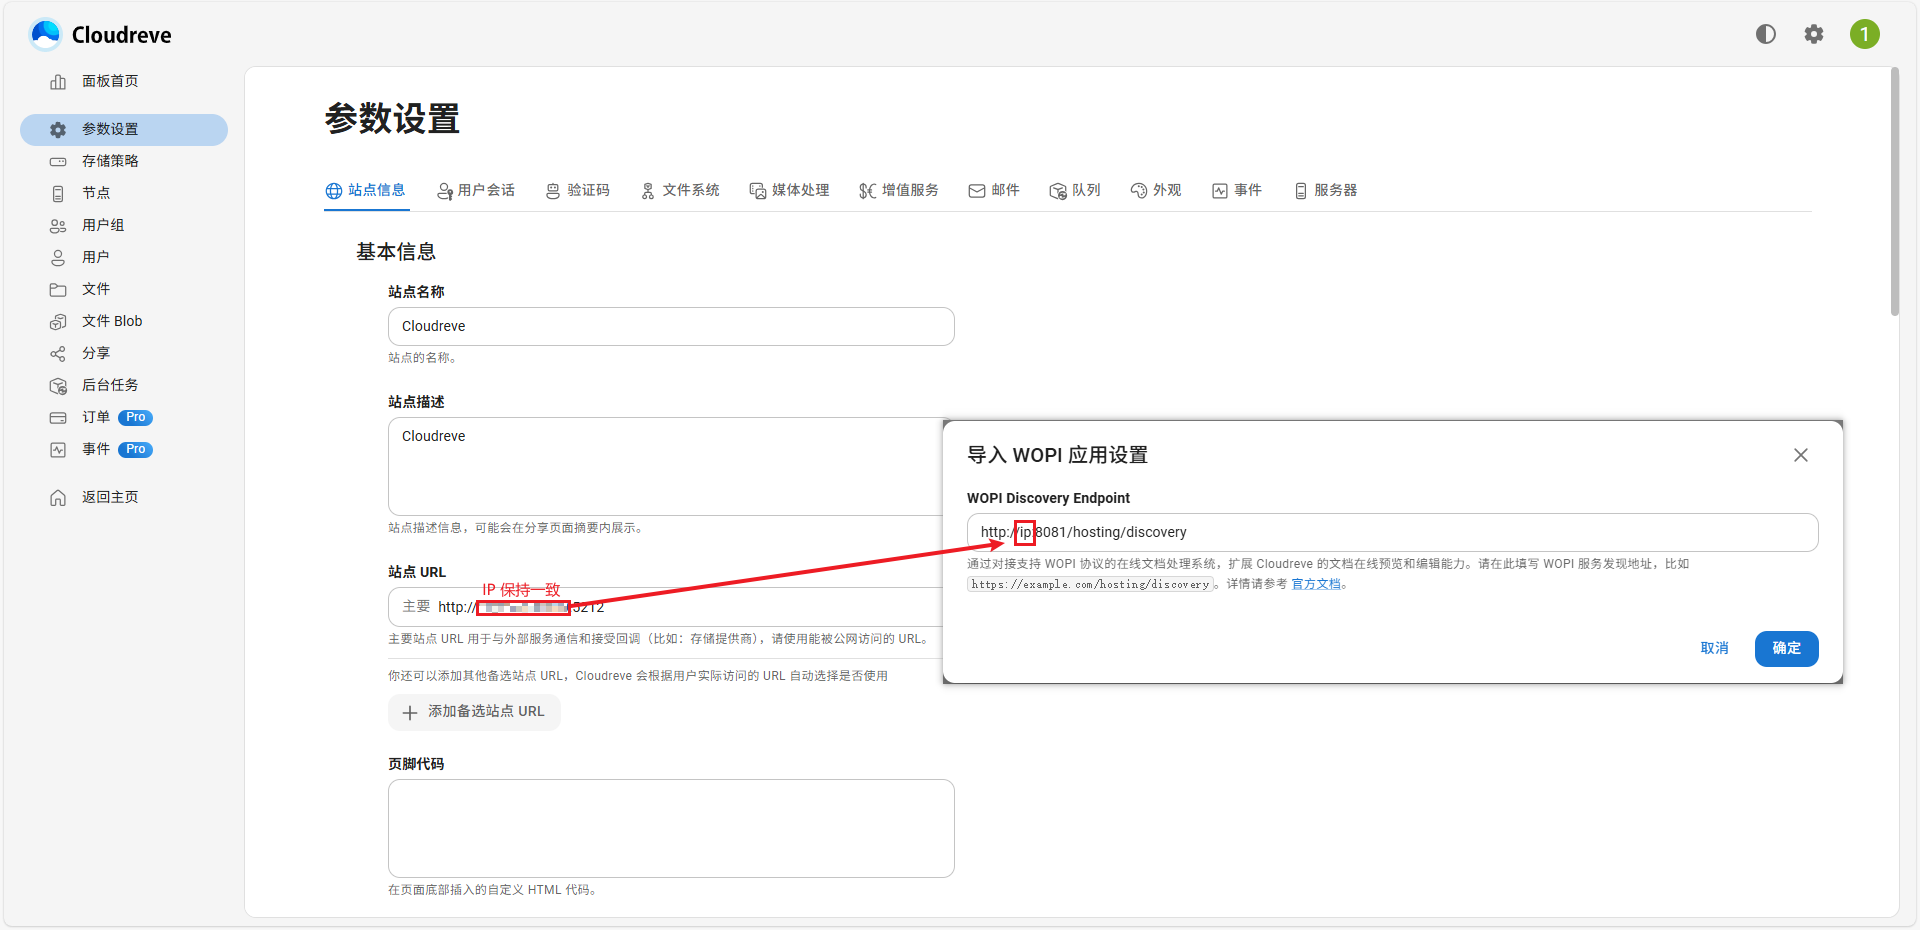
前往 Cloudreve 后台的 参数设置 -> 文件系统 -> 文件浏览应用 -> 添加应用 -> WOPI 协议应用, 将 <你的 WOPI 服务端点>/hosting/discovery 填写到 WOPI Discovery Endpoint 中导入设置。
 (
(图1)
 (
(图2)
 (
(图3)
注意
IP 一定要保持一致,否则会出现回调错误
[ERROR] [localhost] [dKs6] [userId] nodeJS - wopi error checkFileInfo:Error: connect ECONNREFUSED 127.0.0.1:5212
HTTPS
安装配置 cpolar
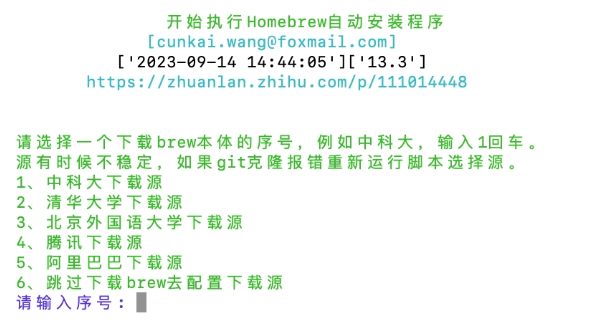
安装 homebrew
1
|
/bin/zsh -c "$(curl -fsSL https://gitee.com/cunkai/HomebrewCN/raw/master/Homebrew.sh)"
|
 (
(图4)
安装 cpolar
 1
 2
 3
 4
 5
 6
 7
 8
 9
10
11
12
|
# 安装cpolar
brew tap probezy/core && brew install cpolar

# token 认证
# 登录 cpolar 官网,点击左侧的验证,查看自己的认证 token,之后将 token 贴在命令行里
cpolar authtoken xxxxxxx

# 安装服务
sudo cpolar service install

# 启动服务
sudo cpolar service start
|
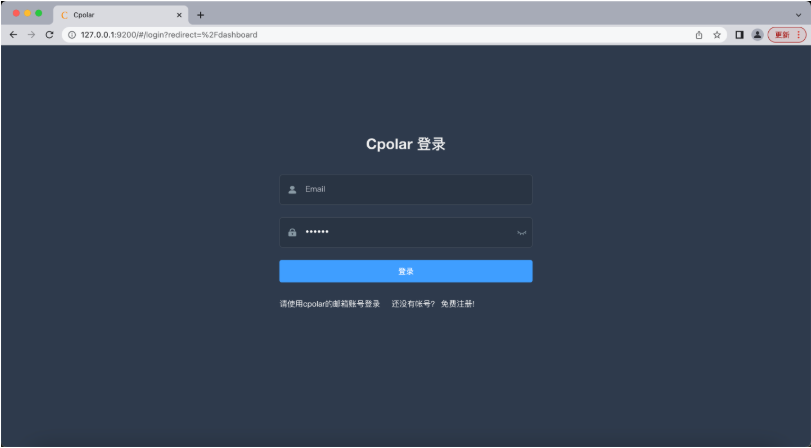
在浏览器上访问本地 9200 端口【127.0.0.1:9200】,使用 cpolar 邮箱账号登录 cpolar web UI 管理界面,即可开始使用 cpolar。
 (
(图5)
配置 OnlyOffice
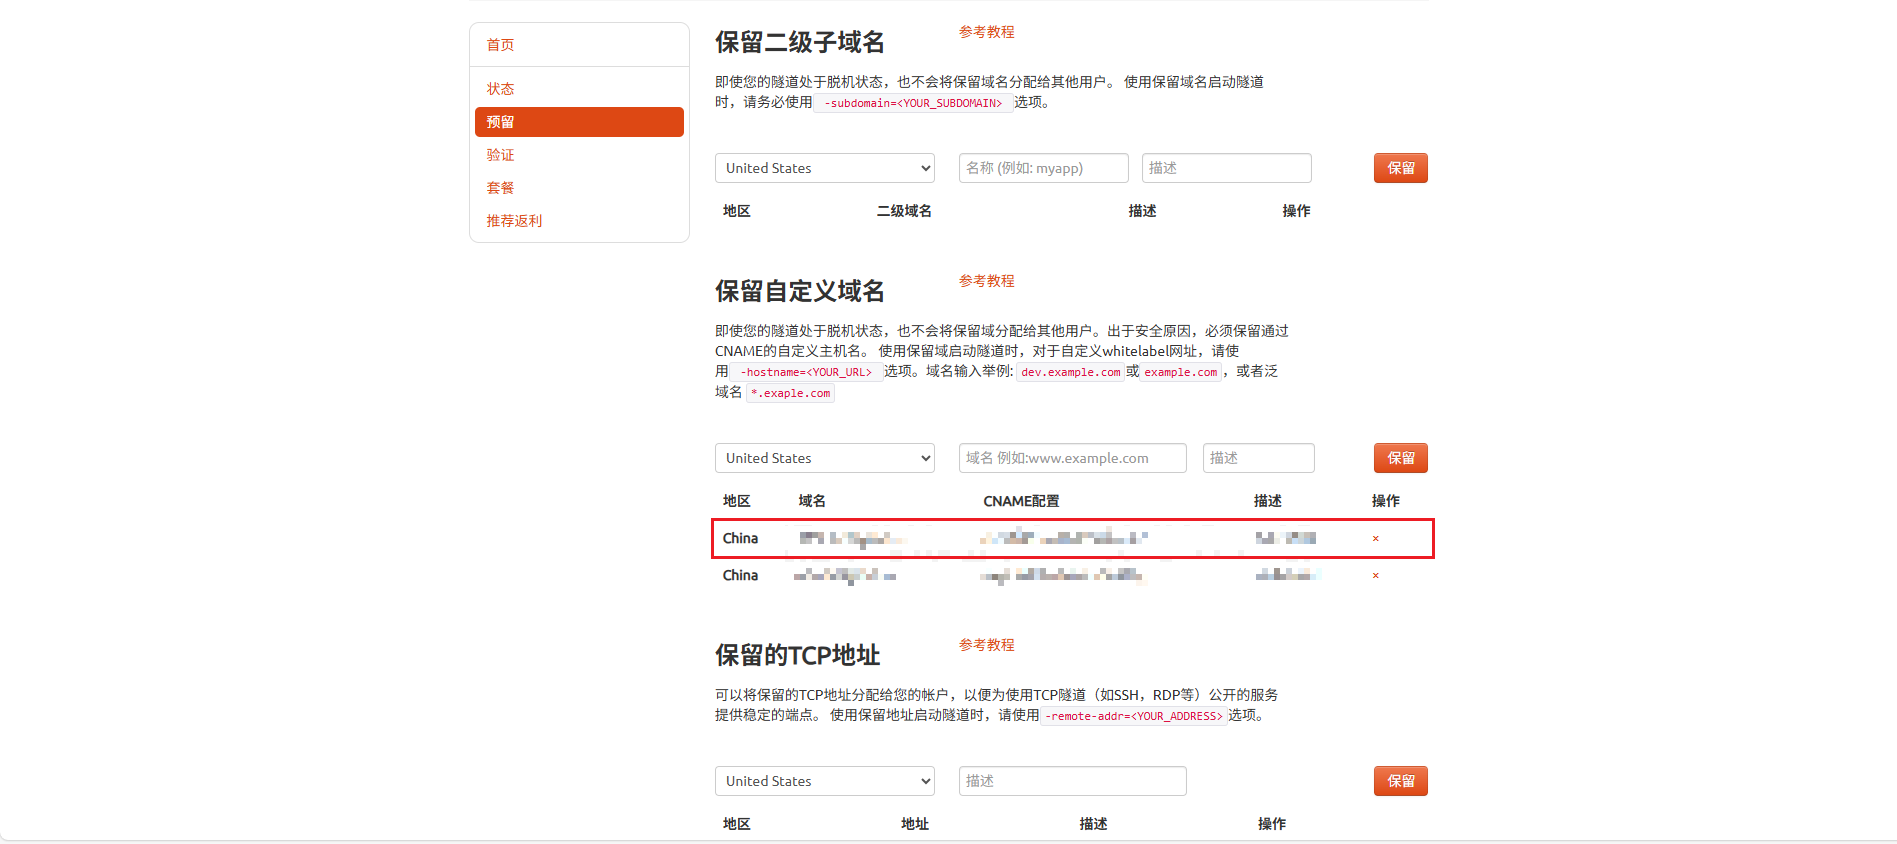
1.cpolar 保留自定义域名
 (
(图7)
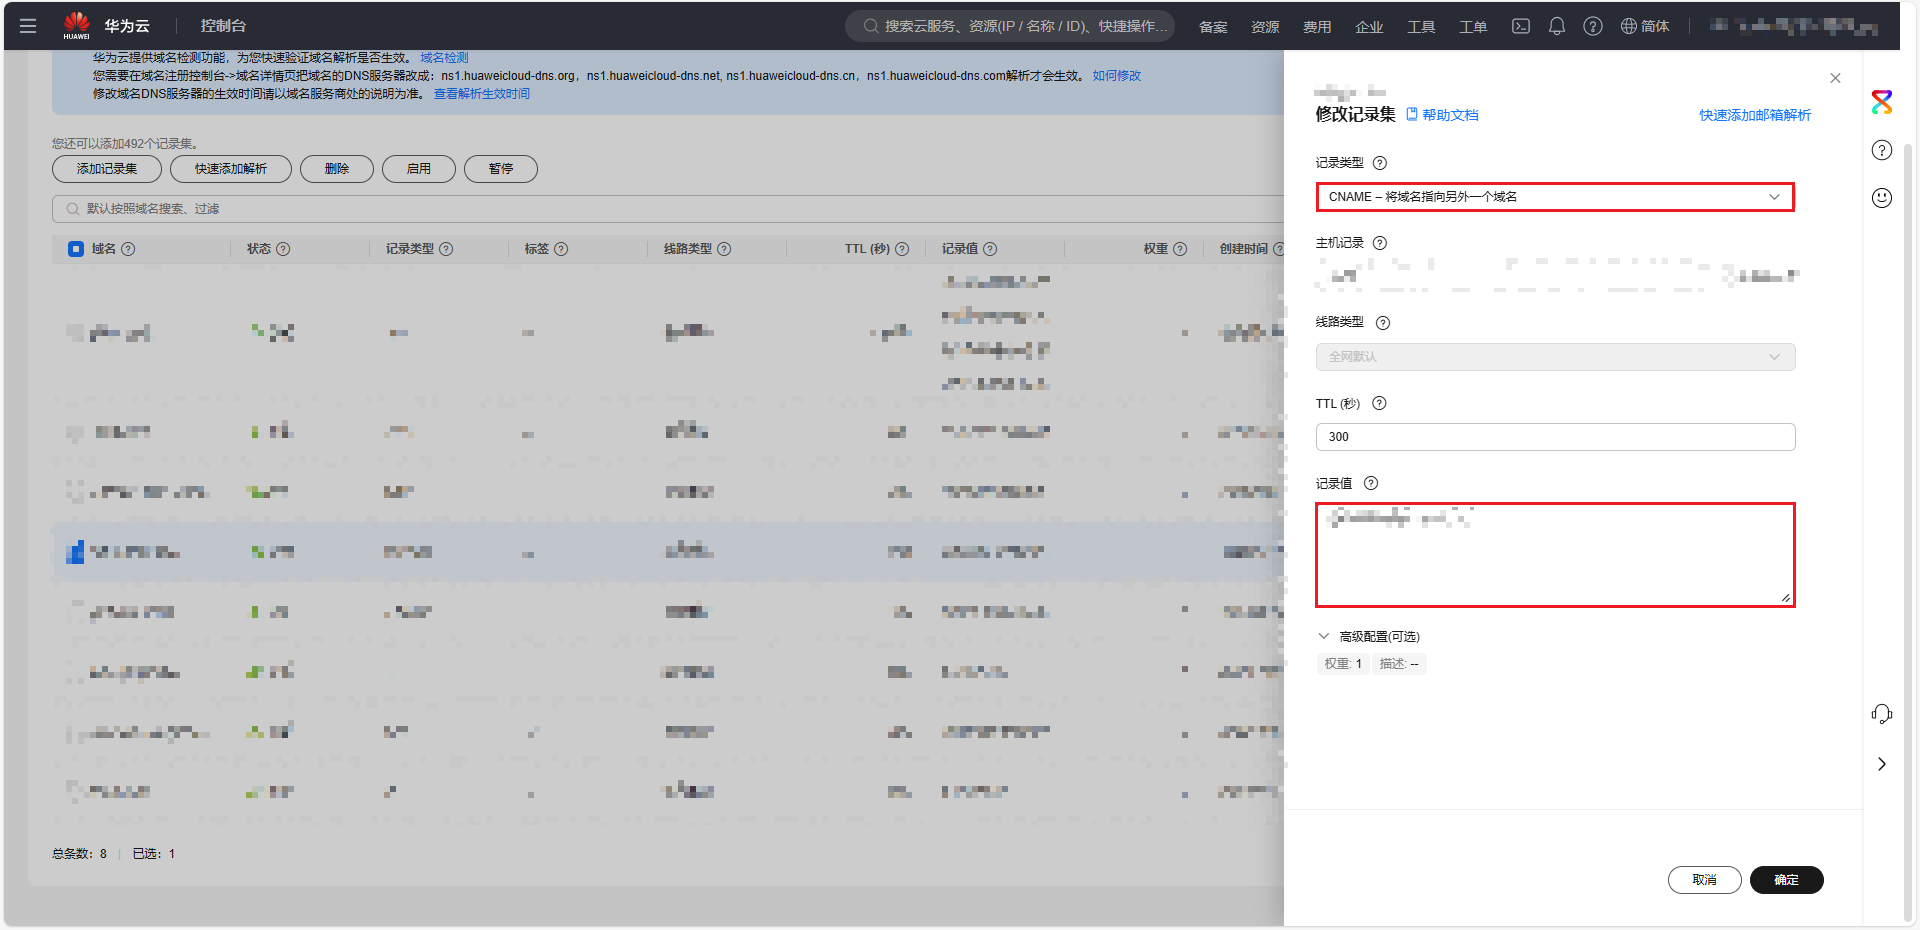
2.域名解析添加记录值
将 cpolar 保留域名的 CNAME 配置 的值填入到域名解析记录值里
 (
(图8)
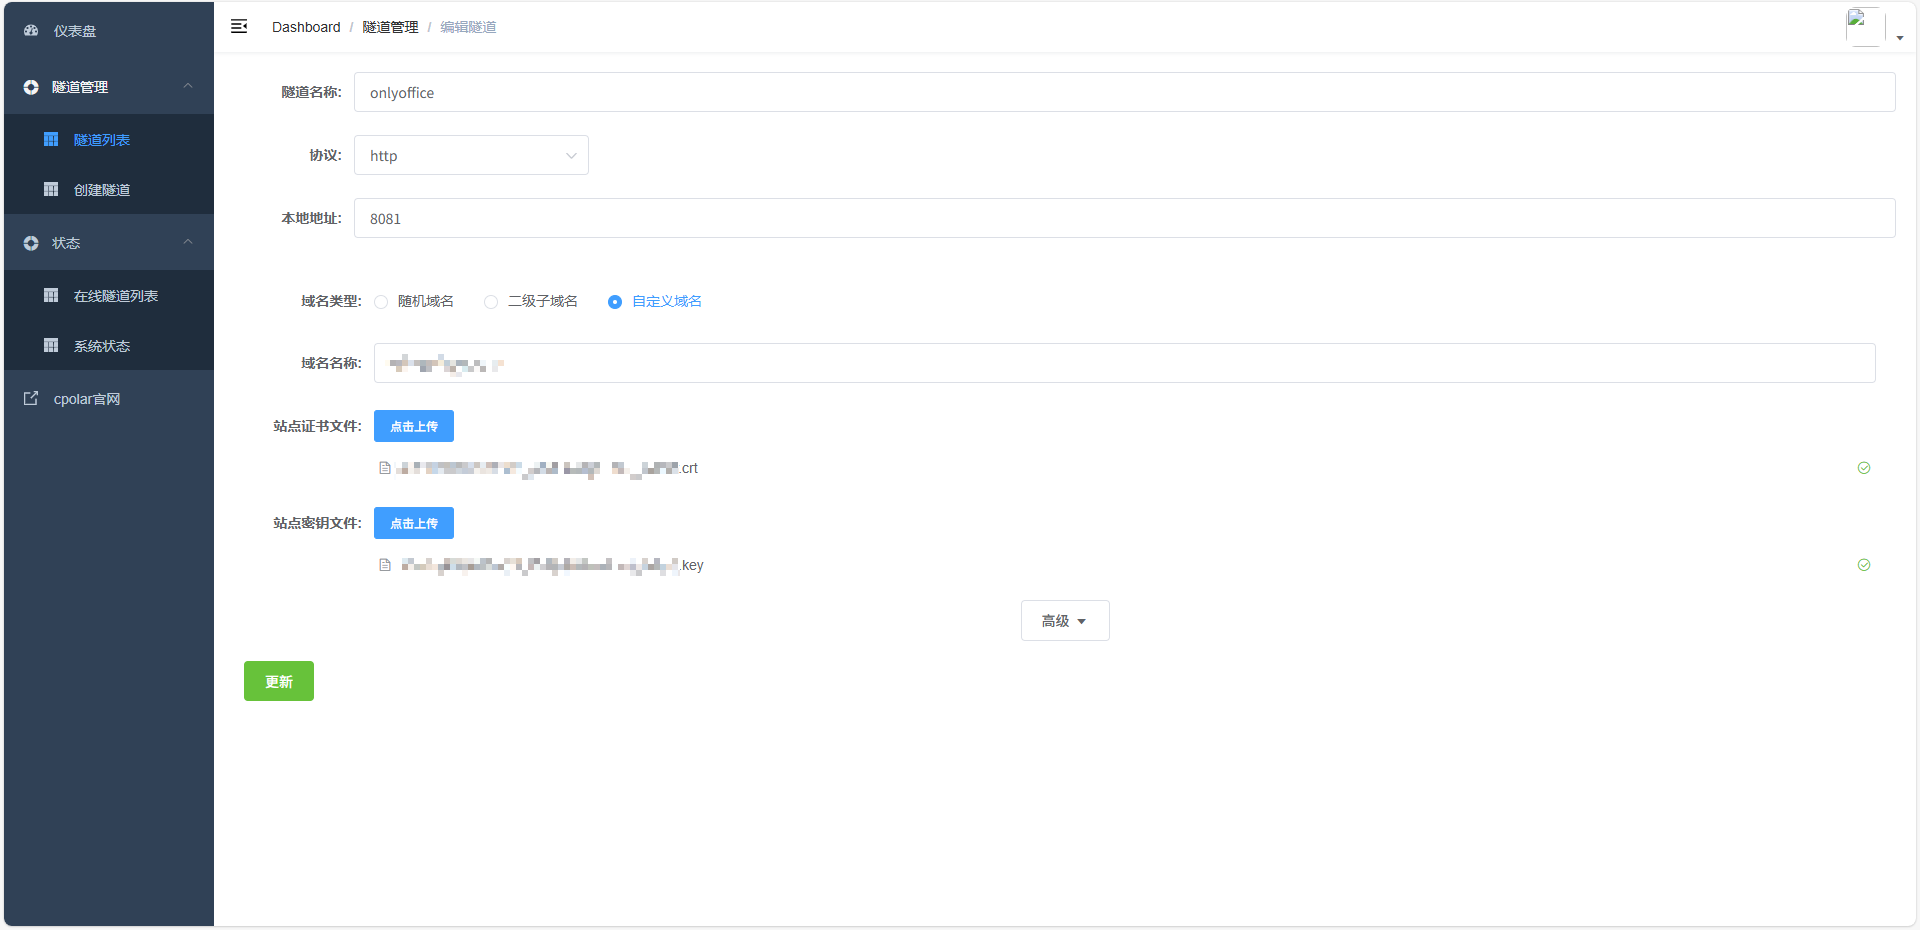
3.cpolar 控制台内网穿透
先将 OnlyOffice 内网穿透出去,上传 SSL 证书文件配置 HTTPS。
 (
(图6)
内网穿透后已经可以通过域名访问 OnlyOffice
在命令行执行命令获取密钥
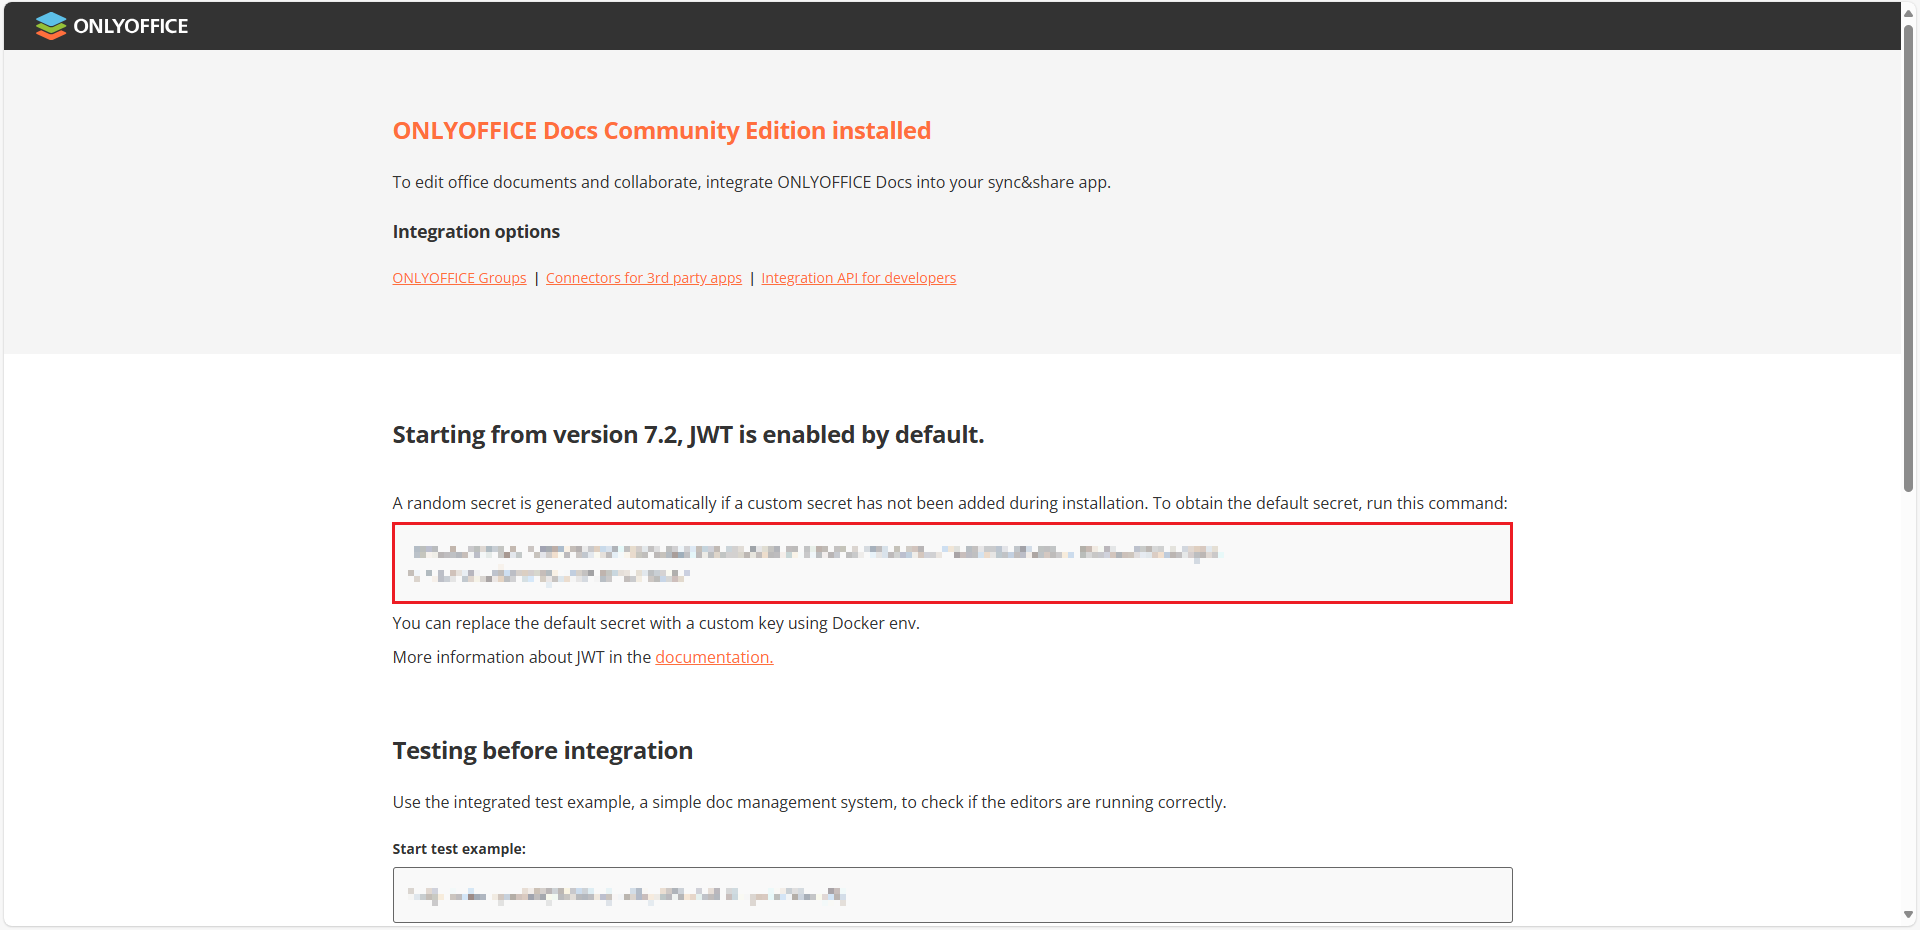 (
(图9)
配置 Cloudreve
1
2
3
4
5
|
Cloudreve/
├── docker-compose.yml
└── backend_data/
    ├── conf.ini
    └── ... (自动生成的其他目录)
|
 1
 2
 3
 4
 5
 6
 7
 8
 9
10
11
12
13
14
15
16
17
18
19
20
21
22
23
24
25
26
27
28
29
30
31
32
33
34
35
36
37
38
39
40
41
42
43
44
45
46
47
48
49
50
51
52
|
services:
  pro:
    image: cloudreve/cloudreve:latest
    container_name: cloudreve-backend
    depends_on:
      - postgresql
      - redis
    restart: always
    ports:
      - 5212:5212
    environment:
      - CR_CONF_Database.Type=postgres
      - CR_CONF_Database.Host=postgresql
      - CR_CONF_Database.User=cloudreve
      - CR_CONF_Database.Name=cloudreve
      - CR_CONF_Database.Port=5432
      - CR_CONF_Redis.Server=redis:6379
      - CR_CONF_WOPI.Endpoint=http://onlyoffice/hosting/discovery  # 使用容器名
    volumes:
      - ./backend_data:/cloudreve/data
    networks:
      - cloudreve_net  # 网络

  postgresql:
    image: postgres:latest
    container_name: postgresql
    environment:
      - POSTGRES_USER=cloudreve
      - POSTGRES_DB=cloudreve
      - POSTGRES_HOST_AUTH_METHOD=trust
    volumes:
      - database_postgres:/var/lib/postgresql/data
    networks:
      - cloudreve_net  # 网络

  redis:
    image: redis:latest
    container_name: redis
    volumes:
      - redis_data:/data
    networks:
      - cloudreve_net  # 网络

volumes:
  backend_data:
  database_postgres:
  redis_data:

networks:
  cloudreve_net:
    external: true
    name: cloudreve_net  # 使用已有的 external 网络
|
1
2
3
4
5
6
7
8
9
|
[System]
Mode = master
Listen = :5212
ProxyHeader = X-Forwarded-For
[Office]
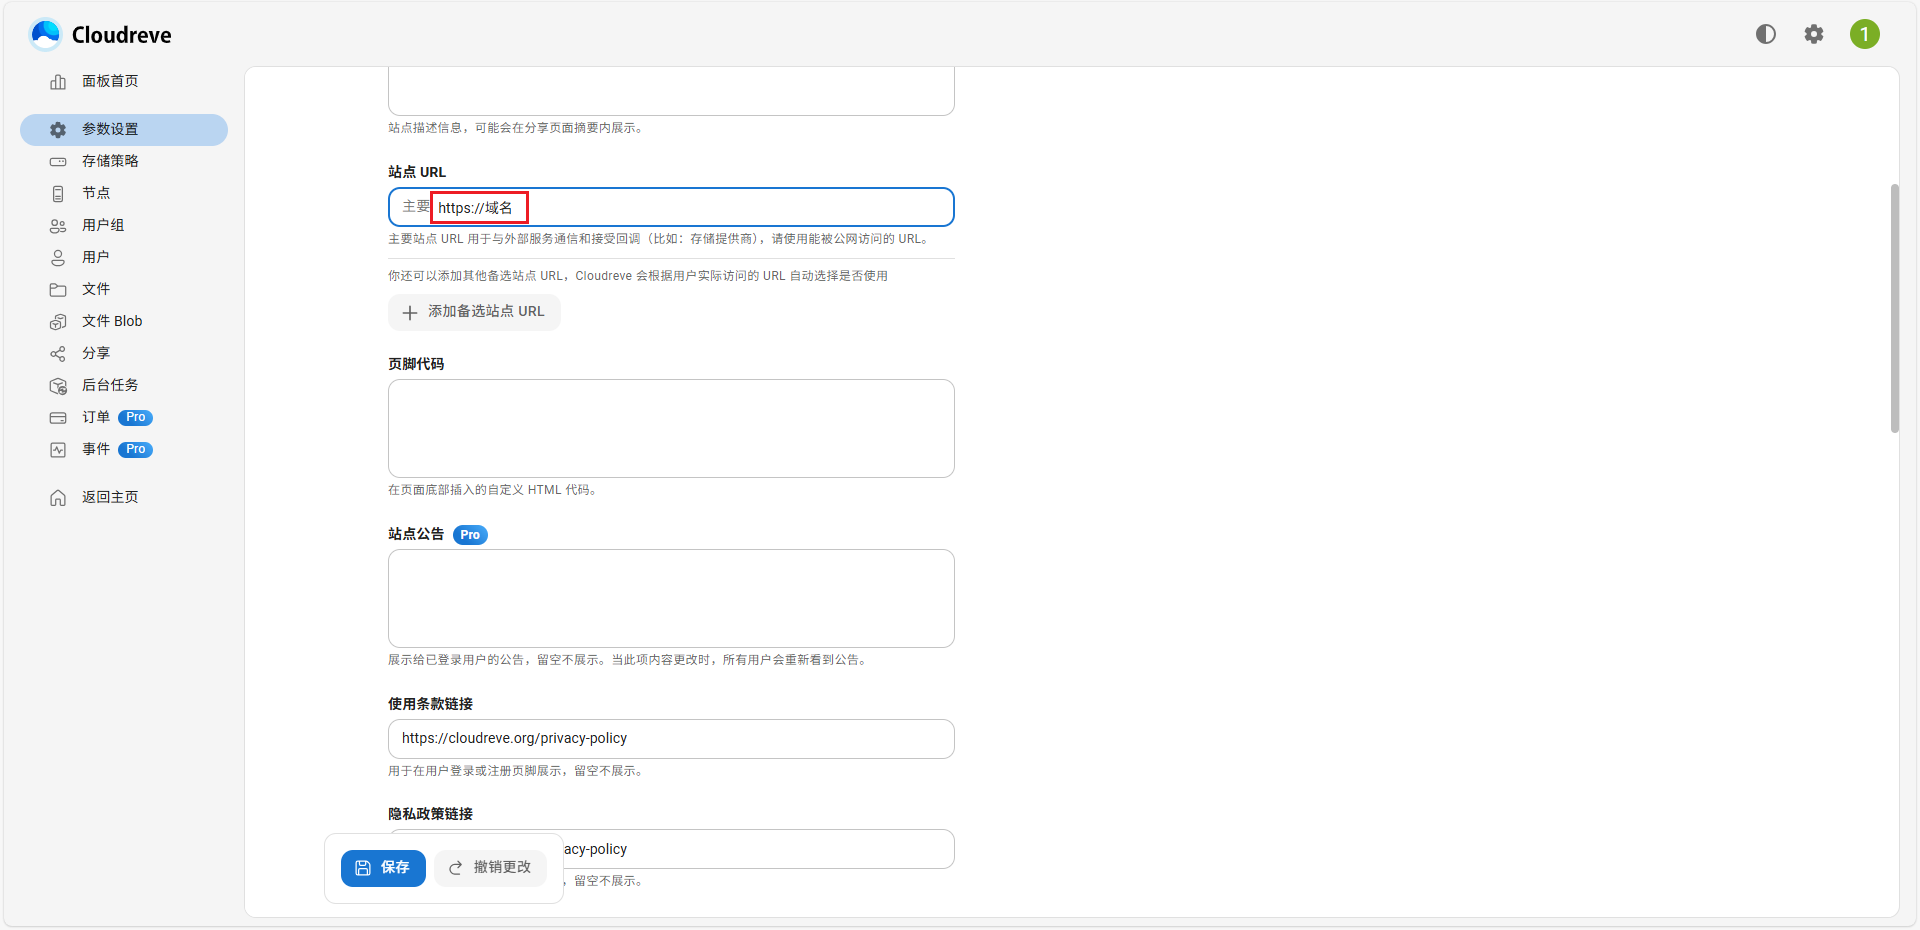
EnablePreview = true
OnlyOfficeURL = https://域名
Secret = OnlyOffice 密钥
|
其余流程(参考上方 OnlyOffice 流程):
cpolar 保留自定义域名- 域名解析添加记录值
cpolar 控制台内网穿透
Cloudreve 接入 OnlyOffice
 (
(图10)
如果这里的图标能正常显示,表示能访问到
 (
(图11)
 (
(图12)